Most homeowners think mold remediation is just a deep cleaning session with strong bleach, but it’s actually a high-stakes clinical containment operation where air science matters more than a scrub brush. You’re likely feeling the weight of health concerns for your family and the constant fear that those dark spots are spreading behind your drywall. It’s an exhausting cycle of stress, especially when you’re staring at insurance paperwork and wondering if your home will ever feel safe again. Understanding the professional mold remediation process step by step is the first move toward regaining your peace of mind.
To see how professional restoration standards are applied in other regions, such as by the team at Swift Response Restoration LLC, you can visit their website for more information on emergency water damage protocols.
The “dirty work” of removal and sanitization is finished, but your recovery isn’t complete until your home looks and feels like it did before the crisis. This final phase of the mold remediation process step by step bridges the gap between a safe environment and a finished living space. We don’t leave you with exposed studs and plastic sheeting. Our team transitions immediately from mitigation to property recovery. Partnering with a veteran-operated team like Exceptional Restoration Services ensures the chaos of the last few days ends with a seamless return to tranquility. We act as your stabilizing force, moving you quickly from the stress of demolition to the satisfaction of a rebuilt home.
We know you want your life back to normal without the disruption of a lingering crisis. This guide breaks down exactly what happens when the experts arrive, moving you from the initial discovery to a certified mold-free home. You’ll learn how professionals identify moisture sources, utilize advanced filtration to protect your air quality, and handle the documentation needed for seamless insurance claims. We’ll preview the essential stages of property recovery, ensuring you have a clear roadmap to a dry, healthy, and protected environment.
Key Takeaways
- Act within the first 90 minutes to stop spores from colonizing new surfaces and use thermal imaging to locate hidden moisture threats.
- Understand the mold remediation process step by step to establish critical containment and negative air pressure, keeping the rest of your home protected.
- Learn why HEPA vacuuming and controlled demolition of porous materials are essential for removing microscopic spores that standard cleaning leaves behind.
- Ensure a safe return for your family with third-party air clearance testing that provides clinical proof your environment is healthy again.
- Transition seamlessly from cleanup to property recovery with professional reconstruction services designed to restore your home to its original state.
Step 1: The Critical First 90 Minutes—Inspection and Assessment
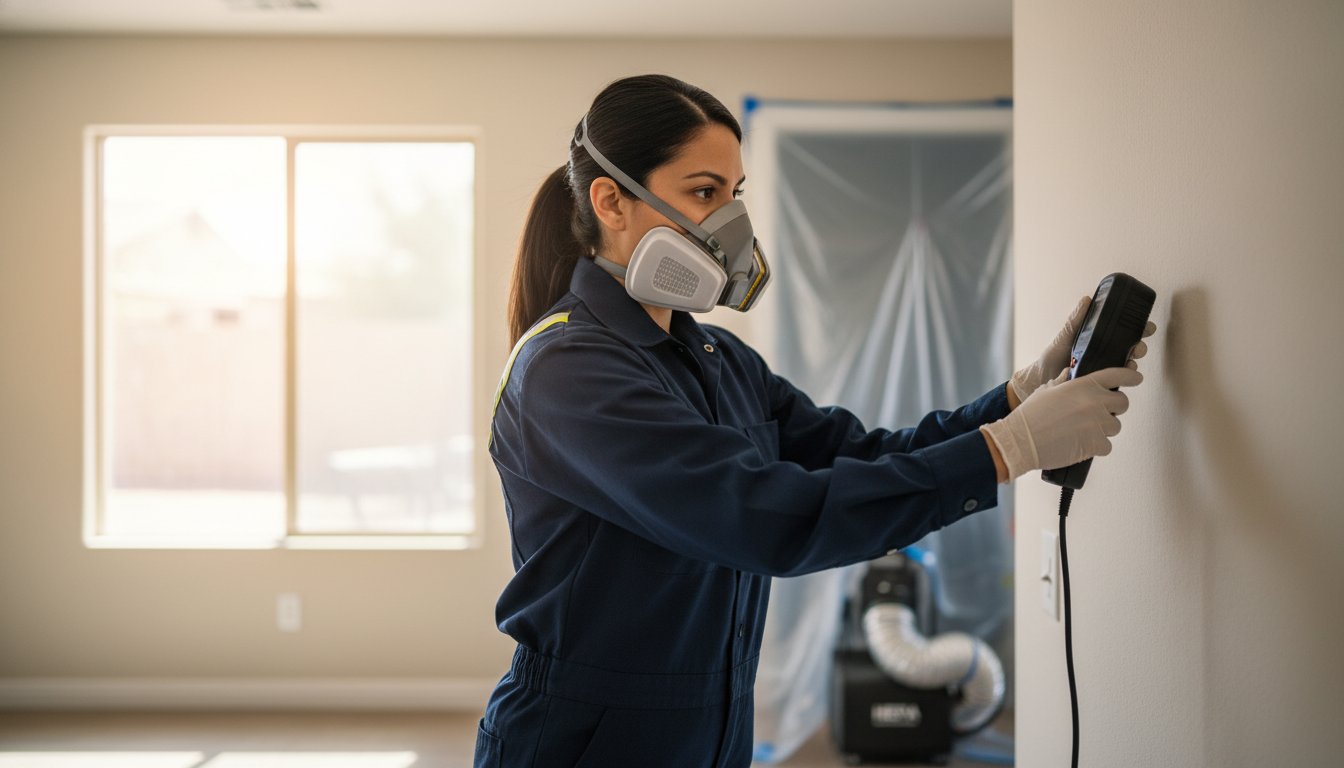
The clock starts the moment moisture enters your home. Within the first 90 minutes, mold spores can begin the process of colonization; this makes an immediate professional assessment your strongest defense. This phase is the foundation of the mold remediation process step by step. We don’t just look for dark spots on the ceiling. We hunt for the moisture source that feeds the growth. Professional remediation is about returning your home’s fungal levels to a safe, natural ecology. It isn’t about achieving a sterile environment, as that is biologically impossible. For homeowners seeking a deeper background on these organisms and their behavior, this comprehensive guide to indoor mold details how these colonies thrive in residential spaces and the health risks they pose.
Differentiating between visible mold and hidden micro-colonies is where expertise matters. While you might see a small patch of growth on a baseboard, the real threat often hides within the wall cavity. These hidden colonies release spores into your breathing zone every time your HVAC system cycles. We identify these clusters before they can spread further into your property. Understanding how to prevent mold after water damage in the critical 24 to 48 hours following a leak is essential knowledge for every homeowner facing a moisture event.
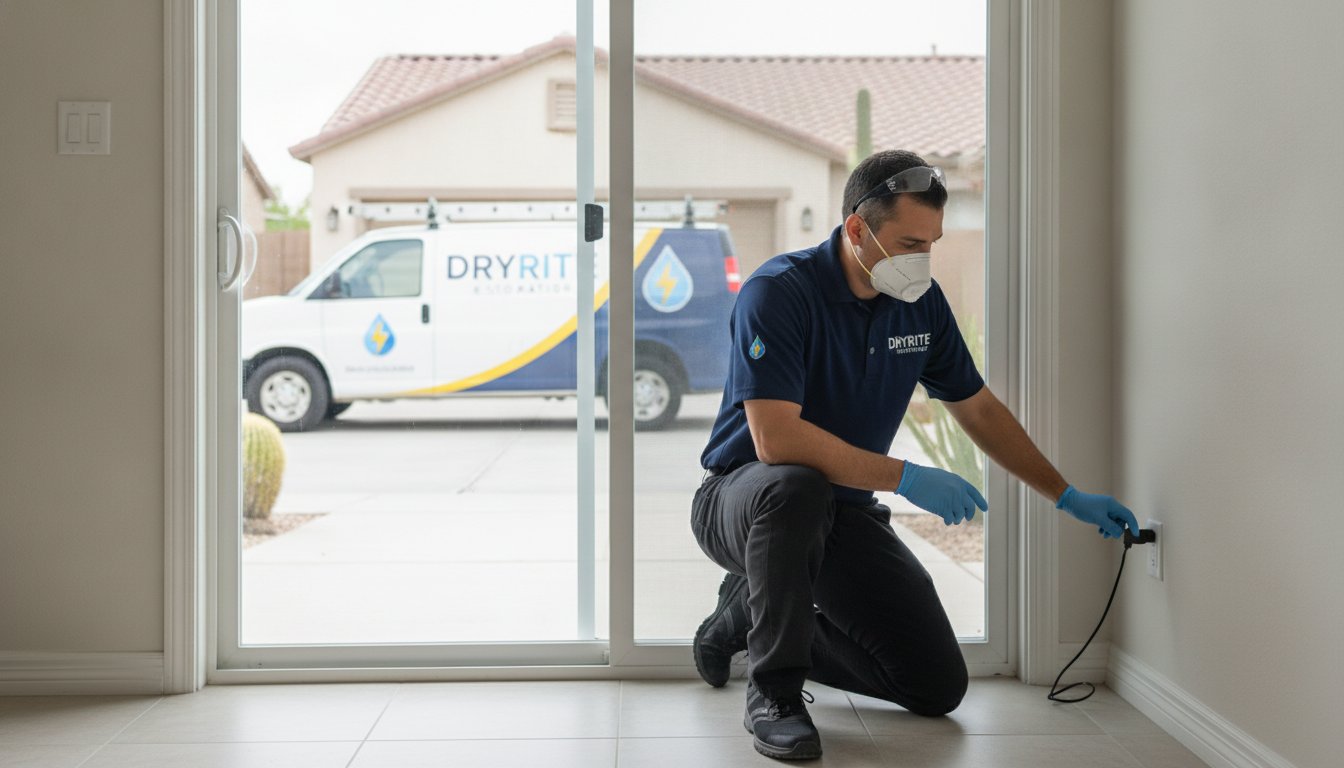
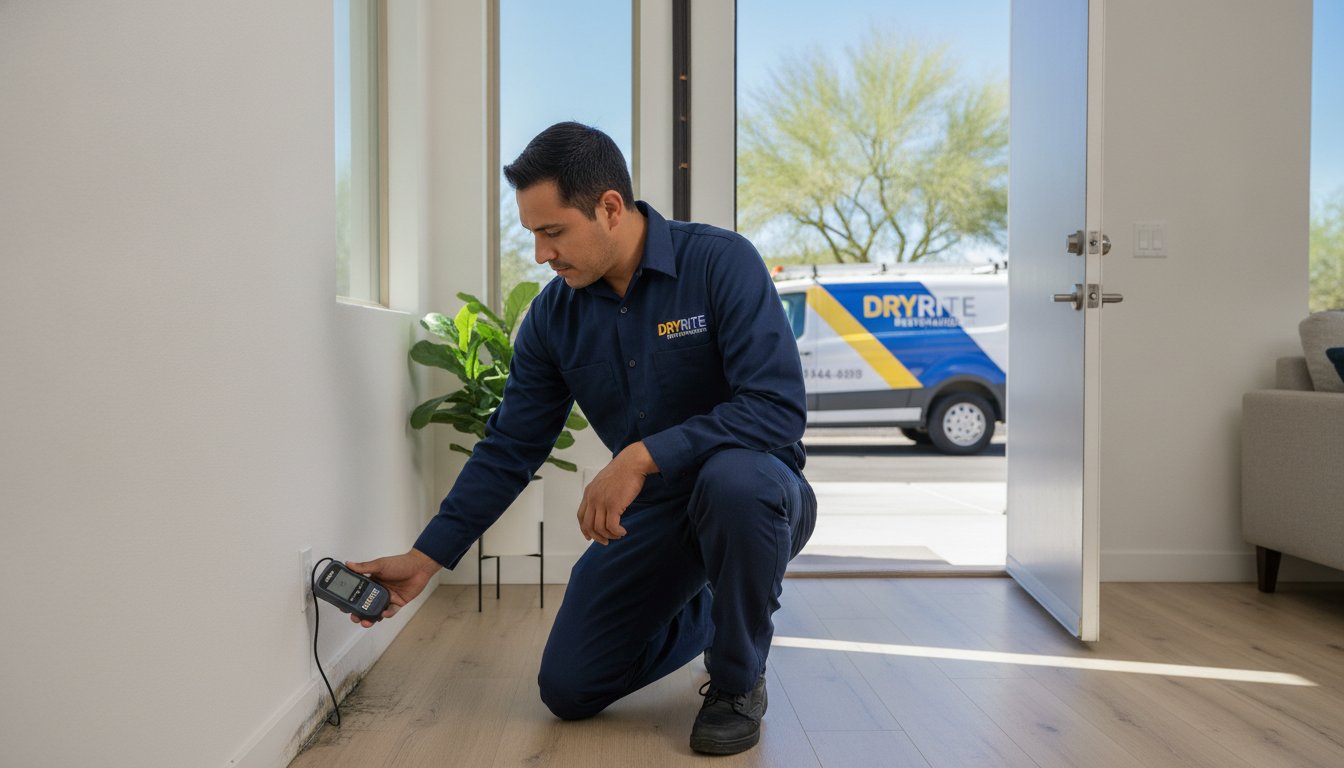
Thermal Imaging and Moisture Mapping
Arizona homes present unique challenges. Our dry air can mask a slow leak behind a wall for weeks until a massive colony forms. We use FLIR thermal imaging technology to detect subtle temperature drops. These cold spots reveal trapped pockets of water that have not yet stained your paint. Our team uses moisture meters to establish a “dry standard” by measuring the moisture content of unaffected materials in your home. This mapping process allows us to be surgical. We only remove materials that are truly compromised. This prevents unnecessary demolition and keeps your restoration timeline as short as possible.
Formulating the Remediation Plan
Your recovery depends on a strategy tailored to your specific situation. We determine the Class and Category of the water damage that triggered the growth. A leak from a clean supply line requires a different protocol than a sewage backup. Once assessed, we establish a firm timeline for containment, physical removal, and final air clearance. We also protect your interests by coordinating with your insurance adjuster. We provide the precise documentation and thermal data they need to process your claim seamlessly. This transparency reduces your stress and ensures no communication gaps occur during the recovery of your home.
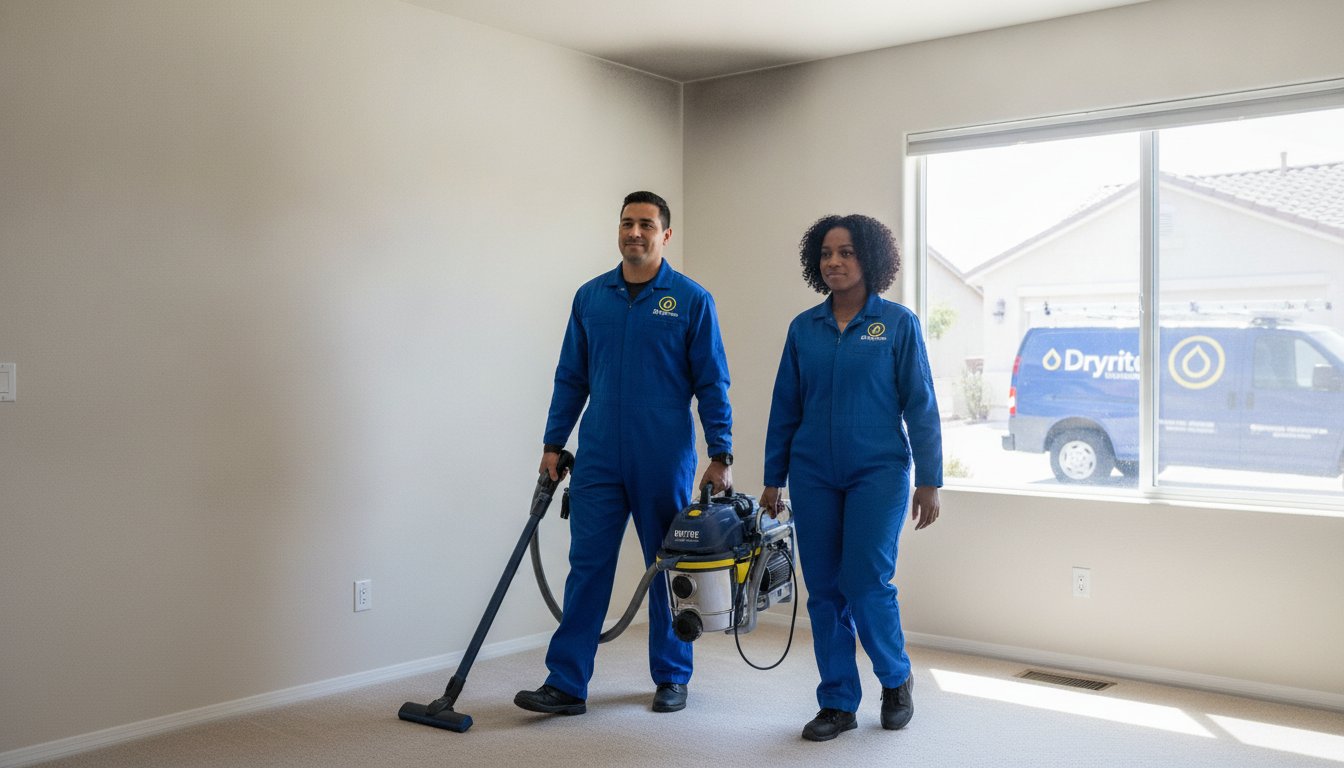
Step 2: Establishing Containment and Negative Air Pressure
Containment is the barrier between a controlled project and a total property disaster. Once mold is disturbed during removal, millions of microscopic spores go airborne instantly. Without a physical seal, your HVAC system will distribute these contaminants to every room in your house. This is why establishing professional containment is the most critical phase in the mold remediation process step by step. We use 6-mil polyethylene sheeting and heavy-duty tension poles to build airtight walls around the affected zone. This isn’t just about hanging plastic; it’s about creating a fortified environment where we can control the atmosphere and protect your family’s health.
Negative air pressure is the engineering secret that keeps your home safe. By using high-powered air scrubbers to exhaust air outside the building, we create a vacuum effect. This ensures that air always flows into the work zone, never out of it. Even if a seal is briefly breached, the pressure keeps the spores trapped inside the containment area. While homeowners can find basic tips in the EPA guidelines on mold cleanup, professional-grade negative pressure is the only way to guarantee that spores don’t migrate to unaffected areas of your property.
The Role of HEPA Filtration
True HEPA (High-Efficiency Particulate Air) filtration is the industry standard for a reason. These filters capture 99.97% of particles as small as 0.3 microns. To put that in perspective, a single mold spore is often between 3 and 40 microns. Standard shop-vacs or home AC filters lack this precision. They often catch visible dust but blow the microscopic spores right back out through the exhaust, making the contamination worse. We run industrial air scrubbers through a continuous 24-hour cycle. This constant air exchange ensures that the room’s entire air volume is scrubbed clean of contaminants before the containment is ever dismantled.
Decontamination Chambers and PPE
Protecting your home requires protecting our technicians. We set up decontamination chambers, often called airlocks, using specialized zipper doors. This allows our team to enter and exit without compromising the negative pressure or releasing spores into your clean hallways. Inside the zone, our experts wear full Tyvek suits and P-100 respirators to prevent inhalation and skin contact. This level of discipline is essential for preventing cross-contamination during debris removal. We treat every project with the clinical precision required for hazardous material handling. If you’ve discovered a leak, our team can provide professional mold remediation to secure your home and stop the spread immediately.
Step 3: Physical Remediation and Antimicrobial Treatment
Physical removal is where the strategy becomes visible. We don’t just spray chemicals and hope for the best. True property recovery requires the clinical removal of contaminated materials. This phase of the mold remediation process step by step involves a combination of controlled demolition and precision cleaning. We start with HEPA vacuuming. This removes the bulk of settled spores from every surface before we introduce any liquids. If you skip this, you’re just turning dry spores into a muddy mess that’s harder to extract. It’s a disciplined approach that separates professional recovery from a DIY attempt.
For structural components like floor joists or wall studs that cannot be removed, we utilize the “Sand-and-Seal” method. We physically sand away the surface growth and then apply a specialized sealant to encapsulate any remaining microscopic hyphae. This ensures the structural integrity of your home remains intact while neutralizing the threat. Following these professional mold remediation guidelines, we then apply EPA-registered antimicrobial solutions. These aren’t standard household cleaners. They are industrial-strength agents designed to penetrate surfaces and kill the root systems of fungal colonies.
Removing Infested Porous Materials
Drywall, carpet, and insulation are often classified as non-salvageable materials. They are porous and act like a sponge for mold. We follow the 2-foot rule: removing materials at least 24 inches beyond the last visible sign of mold. This accounts for the invisible hyphae spreading through the material’s core. Every piece of debris is double-bagged and sealed within the containment zone. This keeps your home’s “clean zones” safe during the transport of waste out of the property. We manage this entire workflow internally to ensure nothing is missed.
Cleaning and Sanitizing Contents
Your belongings require a tailored approach. Non-porous items like metal or glass are sanitized using liquid antimicrobials. Semi-porous items, such as solid wood furniture, may require HEPA vacuuming and specialized cleaning agents. Electronics and HVAC systems are particularly sensitive. We often use advanced fogging techniques to reach deep into structural crevices and ductwork where physical scrubbing isn’t possible. This ensures that even the hidden corners of your home are treated. Our goal is to prevent a recurrence of growth once the project is complete, giving you a fresh start in a safe environment.
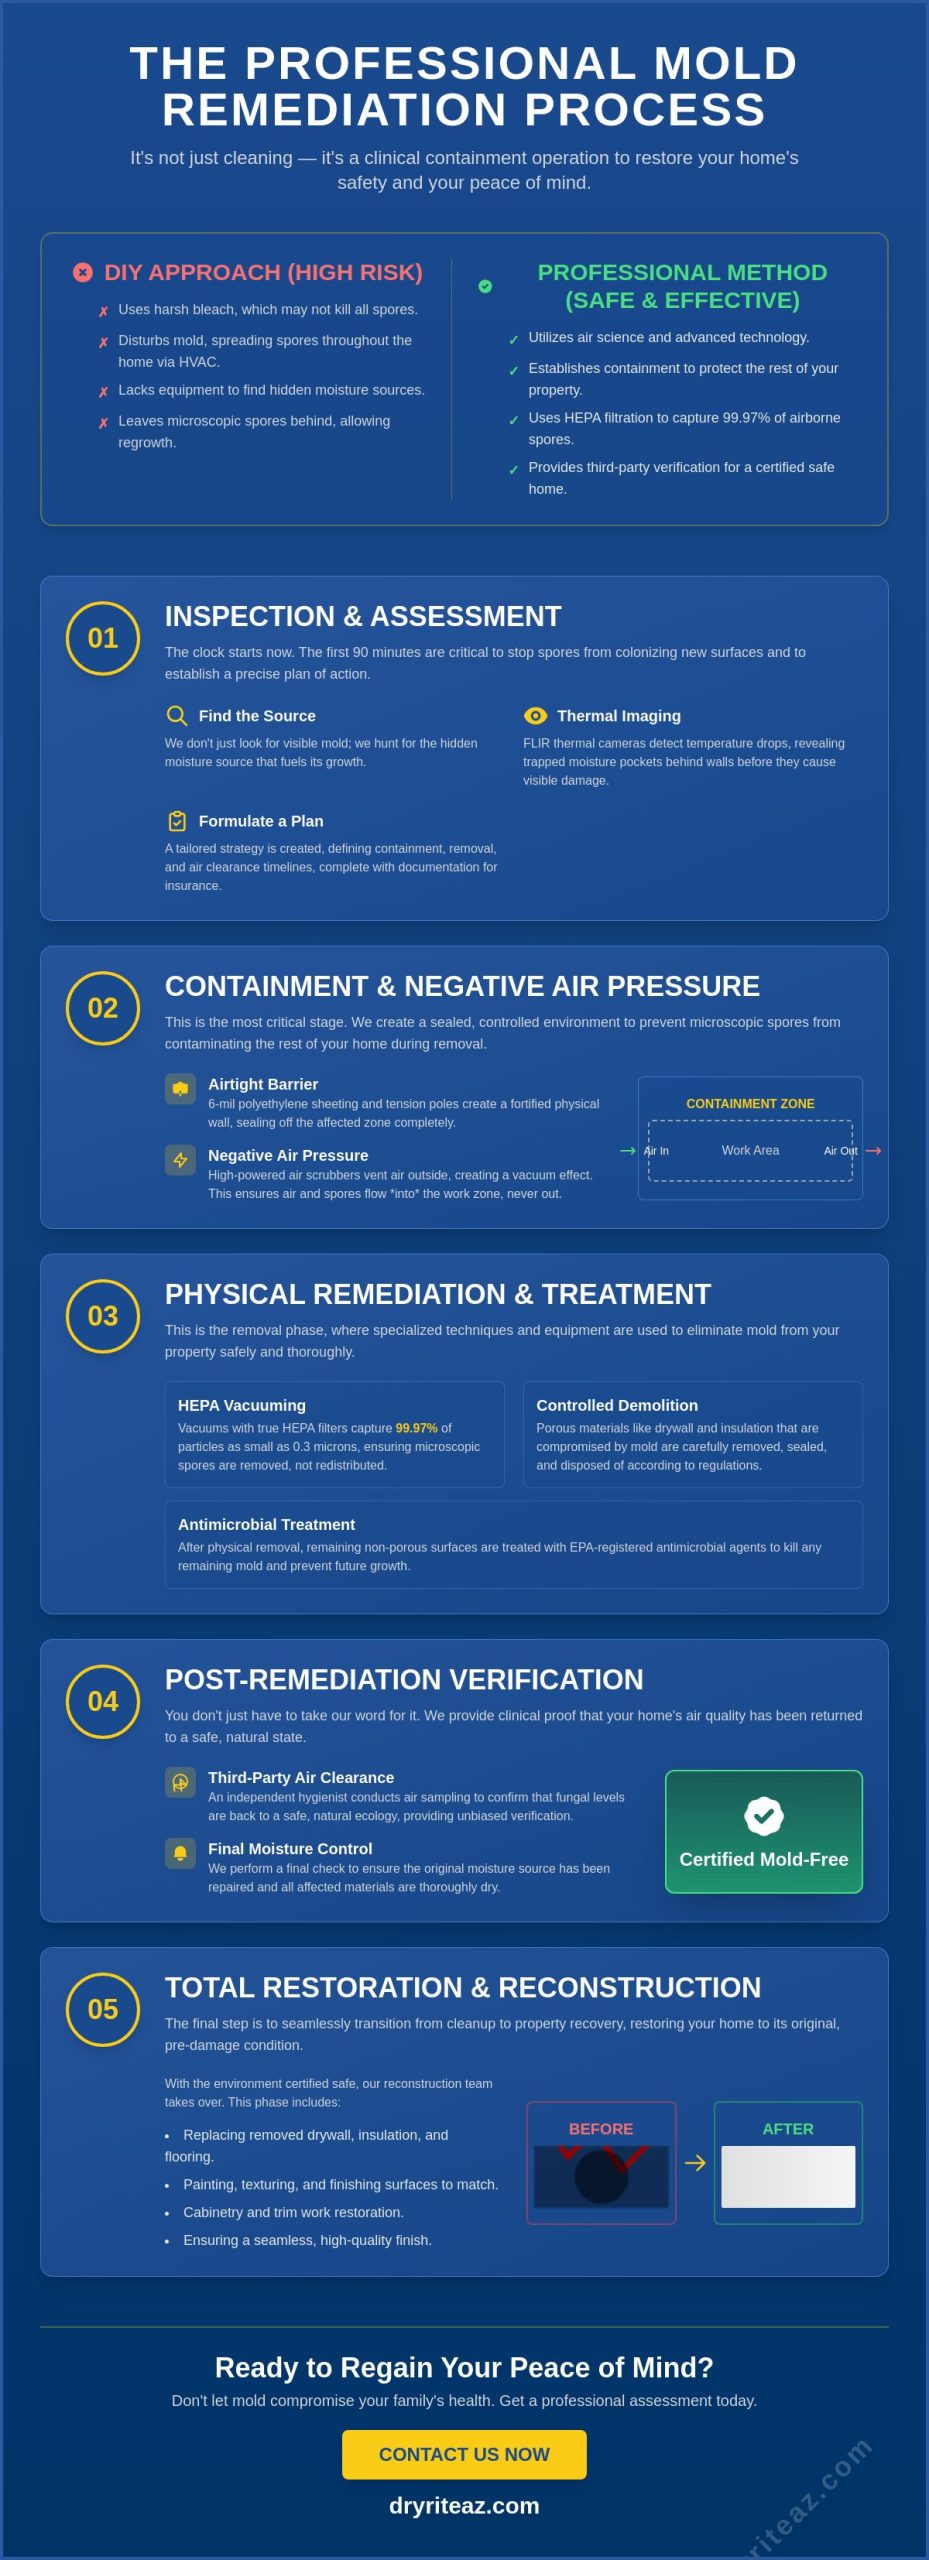
Step 4: Post-Remediation Verification and Moisture Control
Physical removal is only half the battle. Completion isn’t defined by what you can see; it’s defined by what the lab finds in your air. This verification phase is a non-negotiable part of the mold remediation process step by step. We begin with a rigorous “white-glove” visual inspection within the containment area. If any dust or debris remains on a surface, the project does not move forward. We ensure the work zone is clinically clean before we even consider pulling air samples. This discipline prevents failed tests and ensures your home is truly ready for its next chapter.
Arizona homeowners face unique environmental triggers that can restart the mold cycle if ignored. Our desert heat forces AC units to run constantly; this often leads to clogged condensate lines and hidden overflows. Additionally, the intense pressure of Mesa monsoon storms can expose vulnerabilities in roof flashing or window seals. We don’t just remove the mold. We help you identify these specific moisture triggers to ensure the recovery is permanent. For Mesa residents dealing with these seasonal challenges, our professional mold remediation Mesa AZ property recovery guide covers how to contain monsoon-related growth using IICRC S520 standards and coordinate with your insurance to minimize out-of-pocket costs. We stand behind this commitment with a 2-year warranty on our mitigation work, providing the long-term security you need after a property crisis.
Professional Air Clearance Testing
We don’t grade our own homework. To provide an unbiased guarantee of safety, we facilitate third-party air clearance testing. An independent industrial hygienist uses specialized air cassettes to pull samples from inside the containment zone and compares them to an outdoor baseline. The lab analyzes these samples to ensure indoor spore counts are lower than or equal to the natural environment. Once the lab issues a passing grade, you receive a formal Certificate of Completion. This document is vital for your property records and is often required by insurance carriers to close a claim and maintain your home’s resale value.
Preventing Recurrence in the Desert Heat
Moisture control is the only way to stop mold forever. We recommend keeping your indoor humidity levels below 45% to inhibit future fungal growth. Even after the source is fixed, microscopic spores can linger in your ventilation system. Investing in professional air duct cleaning after remediation is a critical step to reset your home’s air quality. Regularly check your AC condensate lines for blockages and inspect your roof after heavy rains. These small maintenance steps act as a shield for your property. If you suspect moisture is returning to your home, book a professional inspection to catch the problem before it spreads.
Step 5: The Path to Total Restoration and Reconstruction
The “dirty work” of removal and sanitization is finished, but your recovery isn’t complete until your home looks and feels like it did before the crisis. This final phase of the mold remediation process step by step bridges the gap between a safe environment and a finished living space. We don’t leave you with exposed studs and plastic sheeting. Our team transitions immediately from mitigation to property recovery. This ensures the chaos of the last few days ends with a seamless return to tranquility. We act as your stabilizing force, moving you quickly from the stress of demolition to the satisfaction of a rebuilt home.
Rebuilding requires more than just hanging new drywall; it requires precision and an eye for detail. We provide comprehensive reconstruction services to match your existing paint, textures, and flooring perfectly. Using a single partner for both mitigation and repair saves you weeks of coordination and prevents communication gaps between different contractors. We also take this opportunity to upgrade your home’s defenses. We install mold-resistant drywall and moisture-blocking primers in high-risk areas like bathrooms and laundry rooms. This proactive approach ensures your home isn’t just restored; it’s reinforced against future threats.
Managing the Insurance Claim
Managing the administrative side of a claim is often more stressful than the physical damage itself. We handle the heavy lifting by providing detailed photo documentation and moisture logs directly to your insurance adjuster. This transparency is vital in Arizona, where many homeowner policies include specific “mold caps” or strict limits on coverage. We navigate these complexities for you, ensuring every step of the mold remediation process step by step is documented to support your claim. Our direct billing process means you can focus on your family’s well-being while we manage the paperwork. You are typically only responsible for your deductible, while we ensure the project is handled with professional accountability.
The Expert Protector Promise
Every project ends with a final walkthrough to ensure our “Expert Protector” promise is met. We don’t consider the job done until you are satisfied with the aesthetic and structural results. We verify that every surface is pristine and every repair meets our high standards for property recovery. This final check is about more than just construction; it’s about restoring your emotional well-being. Order is restored. Your home is safe. The crisis is officially over. We stand by our work, ensuring that the peace of mind you’ve regained stays with you long after we’ve left the property.
Take Control of Your Home’s Recovery Today
Recovering your property from mold is a clinical operation that requires precision at every stage. From the initial 90-minute assessment to the final air clearance test, every detail matters for your family’s health. You now understand the professional mold remediation process step by step and why containment is the only way to stop spores from spreading. By addressing the root moisture source, you ensure that the recovery is permanent rather than a temporary fix. This journey moves you from a state of crisis to a state of total property restoration.
Don’t let the stress of property damage linger. Our IICRC Certified Technicians are ready to act as your stabilizing force. We provide a 2-year warranty on all mitigation work and handle direct insurance billing to minimize your administrative burden. Take the first step toward a dry, healthy home right now. Get a Professional Mold Assessment in 90 Minutes or Less. You’ve navigated the chaos; now let us bring back the tranquility your family deserves. Peace of mind is just a phone call away.
Frequently Asked Questions
How long does the mold remediation process typically take from start to finish?
Most professional projects take between one and five days to complete. The exact timeline depends on the extent of the contamination and the drying time required for structural materials. Large scale property recovery involving multiple rooms may extend this window, but our goal is always to restore order and safety as quickly as possible.
Can I stay in my home while the mold remediation is being performed?
You can often stay in your home if the affected area is small and properly contained. However, we may recommend temporary relocation if the work disrupts essential areas like your only bathroom or kitchen. If family members have respiratory issues or weakened immune systems, it’s safer to stay elsewhere until we receive final air clearance verification.
Is it safe to just use bleach on black mold instead of hiring a pro?
Bleach is not an effective solution for killing mold on porous surfaces like drywall or wood. It often removes the surface color while leaving the root system, known as hyphae, alive and growing. Professional remediation uses EPA-registered antimicrobials that penetrate the material to ensure the colony is actually destroyed rather than just hidden from view.
What is the difference between mold removal and mold remediation?
Mold removal is the physical act of taking out contaminated material, but the mold remediation process step by step is a comprehensive environmental reset. Remediation involves identifying the moisture source, establishing clinical containment, and scrubbing the air to return fungal levels to a safe ecology. It is the difference between a temporary cleanup and a permanent property solution.
Will my homeowners insurance cover the cost of the remediation process?
Coverage depends on the cause of the moisture and your specific policy language. Most carriers cover mold resulting from sudden and accidental water damage, such as a burst pipe, but they may deny claims caused by long term neglect or humidity. We coordinate directly with your insurance adjuster to provide the precise documentation and moisture logs needed for your claim.
What happens if the final air clearance test fails?
We continue the cleaning and air scrubbing process until the lab results confirm a safe environment. A failed test means microscopic spores are still present at levels higher than the outdoor baseline. Our team remains on site to reclean all surfaces and run HEPA air scrubbers until a second independent test provides a passing grade for your property records.
How do I know if the mold has spread to my HVAC system or air ducts?
A persistent musty odor when your air conditioner runs is a primary indicator of HVAC contamination. You may also see dark spotting on supply vents or notice increased allergy symptoms while indoors. If we suspect the system is compromised, we use specialized cameras to inspect the ductwork and determine if professional air duct cleaning is necessary to protect your air quality.
What are the specific signs that mold is growing behind my walls?
Bubbling paint, peeling wallpaper, and unexplained staining are common signs of hidden growth. You might also notice a damp, earthy smell that persists even after deep cleaning the room. We use thermal imaging to detect the temperature drops associated with trapped moisture. This allows us to find these hidden colonies without performing unnecessary demolition on your home.